KITESURFING
GUIDE
FROM ZERO TO INDEPENDENT RIDER
The theory half of learning to kitesurf, written the way it is actually taught in Mui Ne — in the order you will meet it, with the physics that explains why.
The theory half of learning to kitesurf: the wind, the window, the equipment, the rules and the emergencies, written so your instructor can spend the lesson on the water rather than on the sand.
A syllabus replacement, a certification, or a substitute for supervised water time. No part of this guide qualifies anybody to fly a kite unsupervised.
Every safety-critical statement traces to a training body, a formal standard, or a current manufacturer manual. Where the sources disagree, this guide says so rather than picking one quietly.
CONTENTS
- PART ABEFORE THE WATER
- 00START HERE
- 01KNOW YOUR GEARAWAITING LOCAL DATA
- 02READ THE SPOTAWAITING LOCAL DATA
- 03UNDERSTAND THE WIND
- 04THE WIND WINDOW
- PART BCONTROL BEFORE YOU SWIM
- 05KITE CONTROL
- 06POWER & DEPOWER
- 07RIGGINGAWAITING LOCAL DATA
- 08PRE-FLIGHT CHECK
- 09LAUNCH & LANDAWAITING LOCAL DATA
- 10SAFETY SYSTEMAWAITING LOCAL DATA
- PART CIN THE WATER
- 11BODY DRAG
- 12BOARD RECOVERY
- 13WATER RELAUNCH
- 14POWER STROKES
- 15WATER START
- PART DRIDING
- 16FIRST RIDES
- 17CONTROL YOUR SPEED
- 18RIDE BOTH DIRECTIONS
- 19RIDE UPWIND
- 20TRANSITIONS
- 21TOESIDE & JIBE
- PART EJUDGEMENT
- 22RIGHT OF WAY
- 23SELF RESCUEAWAITING LOCAL DATA
- 24CHOOSE YOUR KITEAWAITING LOCAL DATA
- 25WEATHERAWAITING LOCAL DATA
- PART FMUI NE & INDEPENDENCE
- 26RIDING MUI NEAWAITING LOCAL DATA
- 27PROGRESSION MAPAWAITING LOCAL DATA
- 28INDEPENDENT RIDER CHECKLIST
START HERE
This is the theory half of learning to kitesurf. The other half only happens on a beach, with somebody watching you.
WHAT YOU WILL BE ABLE TO DOSay what this guide can teach you and what it cannot, and find yourself on the ladder.
Kitesurfing is not difficult to understand. It is difficult to do, and the gap between those two things is where people get hurt. Everything in this guide is written to close the first gap so that your instructor can spend the lesson on the second.
How to read the four marks
Every instruction in this guide carries one of four marks. They are not decoration. They tell you whether you may act on what you have just read.
- KNOWSafe to read and act on.
- WATCHWhere this goes wrong.
- DANGERInjury, not inconvenience.
- INSTRUCTOR CHECKDo not attempt unsupervised.
- LOCAL NOTEMui Ne specific, and only where verified.
Two things you never do
- Never fly a kite over land near people. Only over open, unobstructed water.
- Never permanently attach yourself to the kite, the bar, or the lines. Every connection you make must be one you can break in under two seconds.
Where you are going
The international standard behind this guide is the IKO progression: four levels, twenty-five named skills, ending at Independent — riding in all directions including upwind, riding among other people, and getting yourself back to the beach without help. Chapter 27 lays out the whole ladder. Chapter 28 is the checklist you measure yourself against.
KNOW YOUR GEAR
A wing on a leash, a bar with three jobs, and four lines that do two different things.
WHAT YOU WILL BE ABLE TO DOName every part an instructor will shout at you, and say what each one does.
Learn the names now. On the beach, an instructor shouting trailing edge does not have time to explain it.
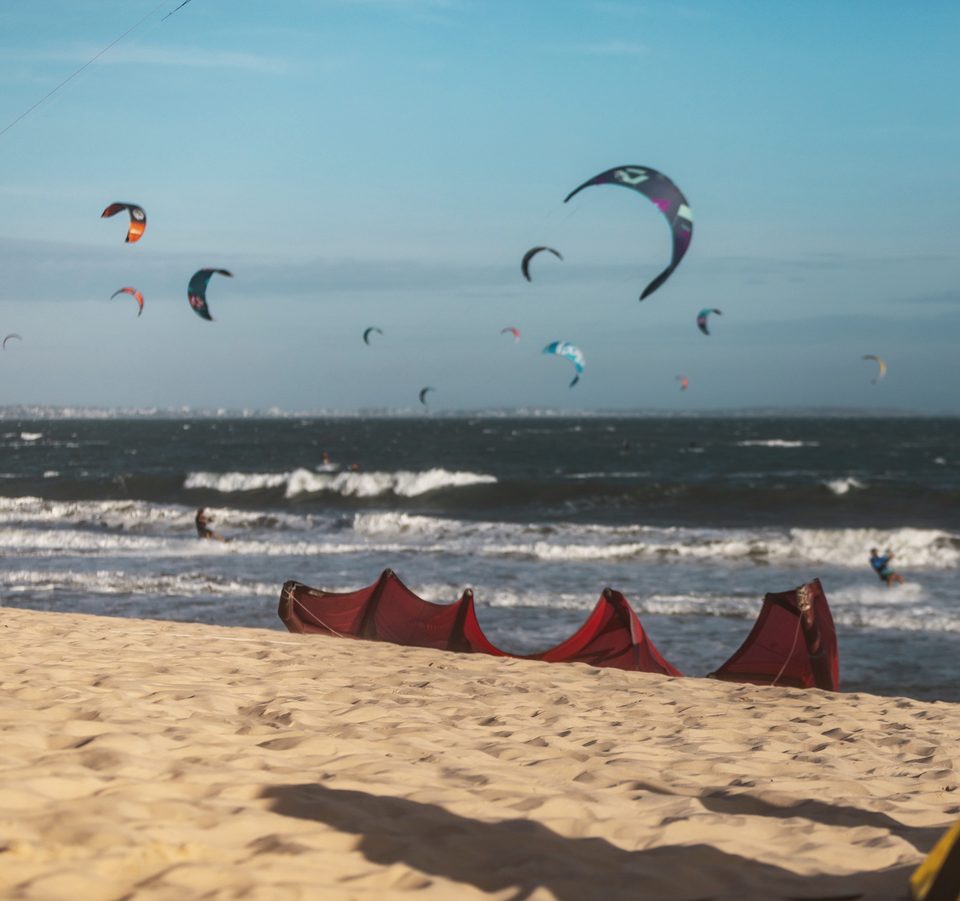
The four lines are not four of the same thing
Two front lines run from the bar’s centre to the kite’s leading edge, and they carry almost all of the load. Two back lines run from the bar’s ends to the wingtips, and they change the wing’s angle to the wind. That asymmetry is the whole reason a modern kite depowers when you let go of the bar: release it and the back lines go slack, the wing pitches forward, and the pull falls away.
Kite types, and what each one costs you
| TYPE | DEPOWER RANGE | WATER RELAUNCH | SUITS |
|---|---|---|---|
| Bow / SLE | Widest | Easy | All levels. What you will learn on |
| C-shape | Narrow | Harder | Intermediate and up, freestyle |
| Delta / hybrid | Wide | Easy | All levels |
| Foil (closed cell) | Wide | Possible, different technique | Light wind, foiling, racing |
After IKO’s equipment course. A foil kite must be closed-cell and water-relaunchable to be used on water at all — and self-rescue with one is harder.
Lines are consumables
READ THE SPOT
Everything the kite can pull you into is downwind of you. That is the only direction that matters.
WHAT YOU WILL BE ABLE TO DOWalk onto an unfamiliar beach and decide, in order, whether it is riskable today.
IKO makes this the very first thing you are taught — before a kite is inflated, before a line is unrolled. It has a name: the SEA assessment, for Spot, Environment and Activity. It also has an outcome that includes no.
Look downwind first
Beginners assess what they can see, which is upwind and in front of them. The hazard is behind that: the corridor the kite will drag you through if it gets away. Walk it with your eyes before you unroll anything.
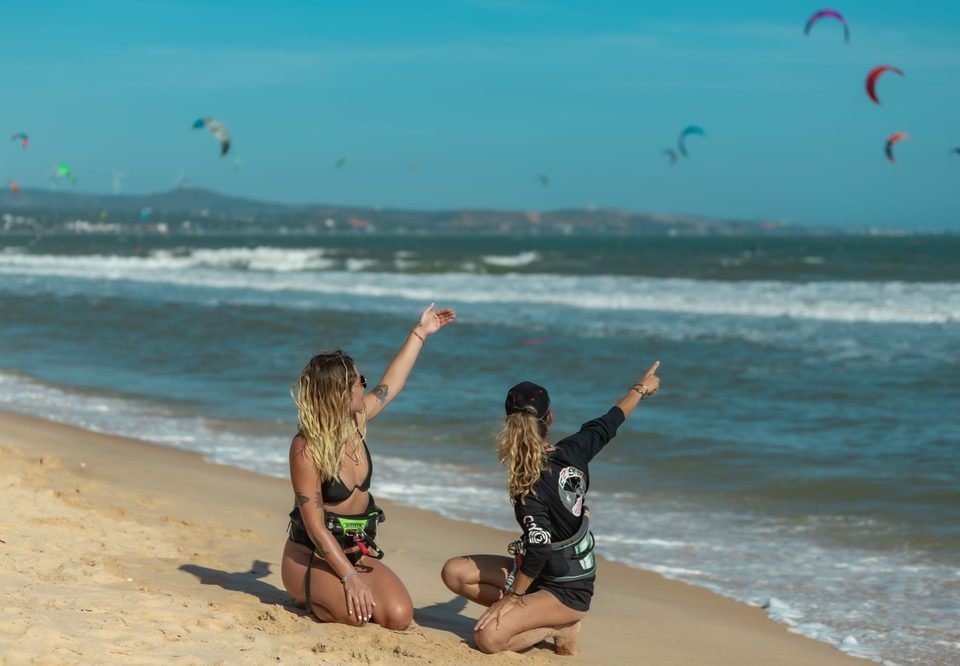
Wind direction is a classification, not a preference
There are two different failures hiding in that row, and reading it as a single best-to-worst scale will teach you the wrong lesson. Offshore takes you away from land, and everything that goes wrong makes it worse. Straight onshore pushes you and the kite onto the beach and everything on it. They are not degrees of the same problem.
Then the water, then the people
- Depth, and how far out you can still stand.
- Tide — a falling tide exposes obstructions that were not there an hour ago.
- Current, and which way it sets.
- Shore break: what the last ten metres do to you and to your kite.
- Everybody else. Other water users have right of way, and you pass downwind of them.
UNDERSTAND THE WIND
Strength, direction, and steadiness. Beginners learn the first two and get hurt by the third.
WHAT YOU WILL BE ABLE TO DOEstimate wind without an instrument, read a forecast critically, and know why a number is never an answer.
You will spend more of your kitesurfing life judging wind than riding in it. Learn to do it from the beach, not from a phone.
Reading it off the world
The Beaufort scale exists because you can estimate wind strength from what it does to things around you: smoke drifts at 1–3 knots, leaves move at 4–6, small branches move at 11–16, whole trees are in motion at 28–33. Learn the middle of that range by feel and you will never be entirely dependent on a forecast.
| FORCE | KNOTS | WHAT YOU SEE | WHAT IT MEANS FOR A KITE |
|---|---|---|---|
| 2 | 4–6 | Leaves rustle, wind on your face | Below teaching wind |
| 3 | 7–10 | Leaves in motion, light flags out | Light. Big kite, or a lesson on the sand |
| 4 | 11–16 | Small branches move, flags flap | The working band for most riders |
| 5 | 17–21 | Small trees sway | Powered up. Size down |
| 6 | 22–27 | Large branches moving | Experienced riders only |
Condensed from Ozone’s published wind table. One knot is 1.15 mph, 1.85 km/h.
The gust is the thing
Two days can share an average and be entirely different sessions. What hurts people is the spread: the gust that arrives while you are already at the limit of what you can hold, and the lull that drops the kite out of the sky while you are relying on it. CORE puts it plainly in its manual — gusts can be deadly. Size for the gusts, not the average.
A forecast is not a measurement
A forecast model and a weather station are different objects and must never be quoted as though they were the same. Models average across a grid cell that may be kilometres wide and sited inland; at a coastal thermal spot they systematically read low. C2SKY’s own analysis found exactly this for Mui Ne.
THE WIND WINDOW
A quarter-sphere downwind of you, the radius of your lines. Where the kite is in it decides some of the pull. How fast it is moving decides more.
WHAT YOU WILL BE ABLE TO DOName every position on the clock, and explain why the kite pulls hardest low and central.
The window is the volume in which the kite can fly. It belongs to the wind, not to the beach: turn around and it turns with you.
The clock
Riders and instructors talk about the window as a clock face, and the vocabulary is worth learning exactly because it is what somebody will shout at you. Twelve o’clock is directly overhead — the zenith. Nine and three are the launching and landing positions, at the window’s edge on either side. The signal chart in Chapter 09 depends on these names.
Why the edge is quiet and the centre is not
At the edge, the kite is flying almost sideways to the wind and receives only the true wind; most of what it makes is spilled rather than delivered to your lines. Move it toward the centre and it can accelerate — and a kite that accelerates makes wind of its own. That induced wind adds to the true wind, and the sum is what the wing actually feels. IKO calls this apparent wind, and it is where the power comes from.
The window has depth
The two views in the plate above are one kite. Move it overhead and the top-down marker collapses onto you, because a kite at twelve o’clock is not downwind of you at all. That is the whole lesson: the window is a volume, not a fan.
KITE CONTROL
You steer with a difference in tension between two lines. Everything else follows from that.
WHAT YOU WILL BE ABLE TO DOExplain what actually turns a kite, and why slow input is safe input.
Everything in this chapter is practised on a trainer kite, on land, with an instructor, before it is attempted with anything bigger. The more time you spend on the trainer, the faster the rest goes.
One hand in, one arm out
Pull one hand toward your body and keep the other arm extended. That difference in tension between the two back lines is what turns the kite. Pull both hands in together and you have not steered — you have sheeted in, and changed the power instead.
Speed of input is power
The faster you move the bar, the faster the kite turns — and the more power it makes on the way round. A small input held for a second turns the kite far more reliably than a hard pull released immediately. A kite also keeps turning until you tell it otherwise; it has no self-centring.
- 01
Fly at the edge, in a figure of eight.
Stay in the outer third of the window where the power is lowest. Eyes on the kite, not on the bar.
COMMON MISTAKEDrifting the pattern lower each pass until the kite is in the power zone and the lesson has changed.
- 02
Let go of the bar, on purpose.
A modern bow or SLE kite depowers when you release the bar. It is the first response to trouble, not the last.
COMMON MISTAKEGripping harder when frightened. The instinct is exactly backwards and it takes deliberate practice to reverse.
- 03
Fly one-handed, then walk while flying.
Both are separate taught skills. You need them because on a real beach your other hand is always doing something.
COMMON MISTAKEWalking downwind without noticing, until you have run out of beach.
POWER & DEPOWER
Five separate controls sharing one object. Learn them apart or you will confuse them under load.
WHAT YOU WILL BE ABLE TO DOSay which control to reach for when you are overpowered, and in what order.
There is no single dial. There are five things that change how hard the kite pulls, and three of them live on the bar.
The first response is always the same
Push the bar away. Sheeting out reduces the wing’s angle to the wind immediately, and Cabrinha calls it your best defence for exactly that reason: it is instant, it is reversible, and it costs you nothing. Everything else — steering the kite to the edge, adjusting trim, firing the release — comes after.
Trim is for the session, not the moment
The trim strap shortens or lengthens the centre lines, which changes the wing’s angle for as long as you leave it there. Set it once you know the wind, and then use bar travel for everything moment to moment. Trim out too far and you have thrown away the bar’s working range: pushing the bar away will have nothing left to give.
Back-stall is the other end of the same mistake
Sheet in too far, trim in too far, or fly on front lines that have stretched, and the kite stalls backwards out of the sky. You lose power and steering together, which is why it is worse than being underpowered. It is also the reason line length gets checked before every session and not once a year.
RIGGING
There is no universal order. There is a universal checklist, and it is not optional.
WHAT YOU WILL BE ABLE TO DOSet up a kite so that every hazard it can create has already been closed.
Rigging happens after the spot assessment, never before. You are choosing where to leave a large, unattended aerofoil for the next ten minutes.
- 01
Choose the place, looking downwind.
The corridor downwind of your kite is where it goes if it gets away. It must be clear of people, of other people’s lines, and of anything hard.
COMMON MISTAKERigging in the first gap on a busy beach. A gap that fits the kite does not fit the accident.
- 02
Inflate, then secure it immediately.
Sand or a board on the upwind tip, spread rather than heaped. The more weight the better.
COMMON MISTAKEWalking away from an inflated kite “for a second”. An inflated kite can fly away on its own and has killed people who were not flying it.
- 03
Lay the lines out at ninety degrees to the kite.
Untangle them where they lie, before anything is connected. Walk them and look for knots, fraying and wear as you go.
COMMON MISTAKEConnecting first and untangling afterwards, with the lines already under some load.
- 04
Connect by the labelled system.
Front to front, back to back, by the numbers or colours the manufacturer printed. Miscrossing lines is common enough that brands engineer against it.
COMMON MISTAKEAssuming symmetry. The bar is not symmetric and neither are the lines.
- 05
Check line lengths, then test the release.
Hook in, take all the trim out, sheet fully in: the bar should reach the top of the safety system. Then fire the quick release and the leash release, and reassemble both.
COMMON MISTAKESkipping the release test because it worked yesterday. Sand gets in overnight.
PRE-FLIGHT CHECK
Four systems, one circuit, and an answer that is allowed to be no.
WHAT YOU WILL BE ABLE TO DORun a complete pre-flight and know what each item is actually protecting you from.
IKO makes this its own named skill, taught before you are allowed to launch as a pilot. It is not a formality bolted onto rigging; it is the last point at which the day is still free to change.
The circuit
| SYSTEM | WHAT YOU ARE LOOKING FOR |
|---|---|
| Kite | Canopy, leading edge, struts, valves closed, bridles intact and free of wear where pulleys run. Pressure firm, not merely inflated. |
| Lines | Equal length, no knots, no fraying, correctly attached, free of each other and of everything else. |
| Control system | Release operates and resets to its indicator. Leash attached, in the mode you intend, routed so it cannot snag. Trim free. |
| You | Harness, leash, helmet, impact vest, knife. Then look at the spot again. |
The four-system order is common to every manual in the source register.
Agree the signal before you launch
You and whoever is holding your kite settle on a release signal while you are both still standing still and can hear each other. Not during.
LAUNCH & LAND
The most dangerous ninety seconds of the session, twice, and both of them happen where the ground is hard.
WHAT YOU WILL BE ABLE TO DOLaunch and land from both sides — as the pilot and as the person holding the kite.
You learn the assistant’s role first. That is deliberate: it is the safer role, and holding a stranger’s kite properly teaches you the geometry faster than flying your own.
If you are holding the kite
- Hold the middle of the leading edge. Never a wingtip, never the trailing edge — both make the kite flip or spin.
- Stand behind the kite, not beside it and not in front of it.
- Touch no bridle and no flying line.
- Do not throw it. Let the pilot steer it out of your hands, then move upwind and out of the way.
- If anything looks wrong, use the “do not launch” signal. You are the last check.
If you are the pilot
- 01
Set up at the edge of the window.
Leading edge into wind, as little power as possible. The exact angle depends on your kite — the principle does not.
COMMON MISTAKESetting the kite straight downwind. Cabrinha marks this as potentially hazardous in its own manual, and it is how a launch becomes a launch you do not control.
- 02
Take the slack out, and signal.
Bar at chest height, a few steps back, then the agreed signal — not a wave, not a shrug.
COMMON MISTAKEInterpreting ambiguity as go.
- 03
Steer it up slowly, with a hand free.
Your spare hand rests where the release is, from before the launch. More wind means everything happens faster.
COMMON MISTAKEPulling the bar in as the kite rises.
- 04
Walk to the water without delay.
Kite at the edge, low. Do not stand on the sand admiring it.
COMMON MISTAKEParking it overhead while you sort out your board.
Landing
Come in slowly with the kite low at the edge of the window, step off the board and body drag the last stretch. Your catcher takes the leading edge as the kite comes down, and walks it away from the water before anything is wound. Self-landing — firing the release and walking up the single safety line — exists and is a taught skill, but it is the fallback, not the plan.
SAFETY SYSTEM
Two stages, one flag-out line, and a set of details that differ by brand in ways that matter.
WHAT YOU WILL BE ABLE TO DOExplain what each release does, what happens after it, and how to learn your own hardware.
This chapter teaches the architecture. It deliberately does not give you a step-by-step actuation sequence, because there is no honest universal one — and a sequence learned from the wrong brand is worse than no sequence at all.
Two stages
The first release separates you from the bar and transfers the kite’s load onto a single front line. Robbed of its angle of attack, the wing loses its power and comes down — this is called flagging out. You are still attached, by the leash, and that is on purpose: you still have your kite. The second release, on the leash itself, separates you from the kite entirely.
What the standard guarantees
Kite releases and their matching leash releases are governed by ISO 21853:2020, in force since February 2020. It sets a maximum release force of 170 newtons and a maximum opening time of two seconds, tested dry and clean, in dry sand, in sandy water, in fresh water, and cold and wet. Compliant hardware carries the number stamped on it, so you can check your own bar.
What is not universal
Across the five current manufacturer manuals behind this guide, four things differ: which way the release is actuated, what the kite does afterwards, what the reset indicator looks like, and — least known of all — what your leash setting does to the whole chain.
The chain, link by link
Seven links in the chain. Each one is filled in once the school’s own equipment is confirmed — and until then this guide will not print a plausible guess, because on this page a plausible guess is the dangerous kind.
- 01
Connection to harness
How the chicken loop is held on the spreader bar
- 02
Leash attachment
Where the leash clips, and to which ring
- 03
Leash mode taught
Flag-out mode, or a mode that does not fully depower
- 04
Primary quick release
The actuation — push away, push down and away, or pull
- 05
Flag-out state
What the kite does once the primary release is fired
- 06
Secondary release
The leash release, and what it separates
- 07
Reset
The indicator that says the system is armed again
Maintenance is part of the system
- Operate the release and the leash release before and after every session, then reassemble them.
- Keep sand out. Rinse with fresh water.
- Store the release open; reload it at the next setup.
- Confirm the reset indicator every time, not the click.
BODY DRAG
The water lesson without a board, because a fall here costs nothing and teaches everything.
WHAT YOU WILL BE ABLE TO DOMove where you want to go in the water using only the kite, in both directions.
Body dragging is where you first meet the kite’s power in an environment that forgives it. It is also where relaunching and self-rescue technique get practised in earnest.
Downwind first
Two hands on the bar, kite stable, and let it pull you. You are learning what a given kite position feels like when it is attached to your whole body weight, and how to keep your head out of the water while thinking about something else.
Then upwind, with one arm out
Extend one arm like a rudder, keep the kite low on that side, and you will track across and slightly into the wind instead of straight downwind. This is the single most useful thing in the chapter, because it is how you get a lost board back — and it is the same body position you will use if you ever have to sail a kite home in Chapter 23.
BOARD RECOVERY
You will lose the board before you can ride it. Getting it back is a skill, not an accident.
WHAT YOU WILL BE ABLE TO DOFind, reach and recover a board without losing control of the kite.
IKO teaches upwind body drag and board recovery as one skill, and the reason is geometric: you sink, the board floats, and the two of you drift at different rates. The board ends up upwind of you almost every time.
Mark it before you move
Take a bearing on something fixed ashore before you start dragging. The board is small, low and the same colour as the chop, and thirty seconds of looking for it is thirty seconds of not flying your kite.
Then drag to it
One arm out, kite low on the upwind side, and work across. Pick the board up without letting the kite drop — which in practice means looking at the kite and feeling for the board, rather than the other way round.
WATER RELAUNCH
The kite going down is normal. Whether it comes back up was decided on the beach.
WHAT YOU WILL BE ABLE TO DOGet a kite off the water, and know when it is not going to happen.
Proper inflation, especially of the leading edge, is what makes a kite relaunchable. Cabrinha marks this as imperative and checks it before entering the water, which is exactly the right place to care about it.
The principle, on an inflatable kite
- 01
Get it onto its side.
If the kite is face down, pull one rear leader line toward you and hold constant tension. You may need to pull a full metre before the wingtip lifts.
COMMON MISTAKEWrapping the leader around your hand. Never do this — the kite can power up without warning.
- 02
Let it work to the edge.
Once on its side, the kite migrates toward the edge of the window on its own. In light wind this takes patience.
COMMON MISTAKELosing patience and pulling on both sides of the bar, which puts the kite straight back down.
- 03
Then fly it up.
Release the leader and steer it into the sky, levelling the bar. Be ready to push the bar away as it comes up powered.
COMMON MISTAKECommitting to one side, switching halfway, and starting again.
When it is not going to relaunch
There is a point at which the honest answer is that the kite is not coming up, and continuing to try is spending energy you will want later. That decision is the start of Chapter 23, and recognising it early is the whole skill.
POWER STROKES
A parked kite pulls. A kite steered fast through the same place pulls several times harder. That difference is the sport.
WHAT YOU WILL BE ABLE TO DOTell a steady pull from a power stroke, and control how big a stroke you have just made.
IKO names these together as one skill for a reason: they are the two ways of getting force out of a kite, and confusing them is how beginners get pulled off their feet.
Where the extra power comes from
A kite parked in a position generates roughly constant pull from the true wind. Steer it down and across the window and it accelerates — and an accelerating wing makes its own wind, which adds to the true wind and raises the force enormously. The stroke is a dive and a recovery, and the recovery matters as much as the dive.
WATER START
A power stroke with a board on your feet. Nothing new, except that now you go somewhere.
WHAT YOU WILL BE ABLE TO DOGet up on the board and travel in a controlled direction.
This is the moment people book the trip for, and it is also the moment where the earlier chapters get audited. If body drag, board recovery and relaunch are not solid, a failed water start leaves you in deep water without a way back.
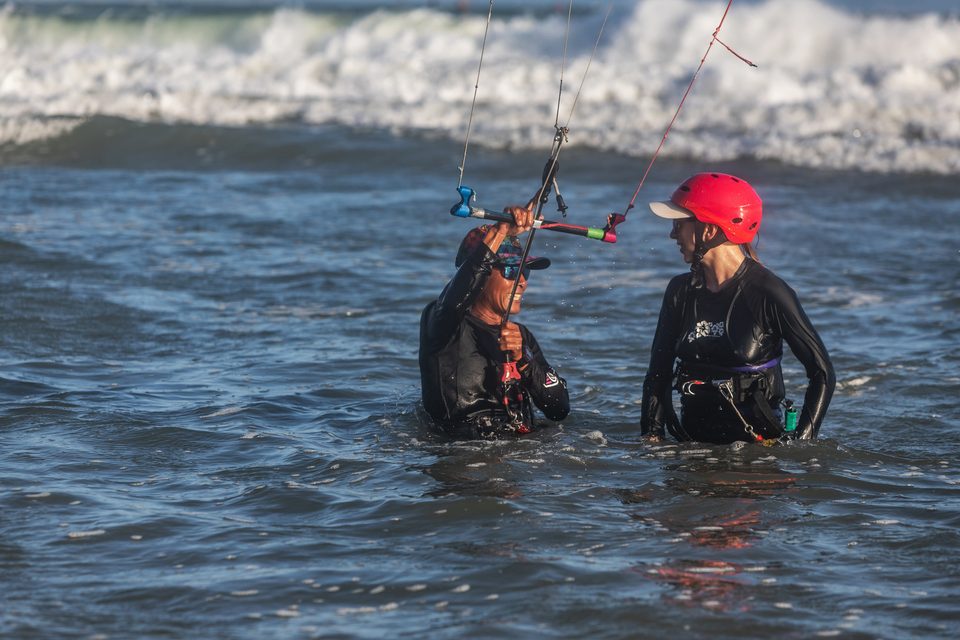
You go downwind first
The first direction you travel is a broad reach — slightly downwind of across — and it is the fastest point of sail. IKO says so in as many words. The board has to be moving before it can be edged, and you cannot edge against nothing.
- 01
Board on, kite parked, sitting in the water.
Feet in the straps or on the pads, board across the wind, kite at rest at the edge. Nothing happens until you are settled.
COMMON MISTAKEFighting the board. If it will not go on, park the kite properly first.
- 02
Send the kite down and across.
One smooth stroke through the window. The pull arrives a beat after your hands move.
COMMON MISTAKEA stroke twice the size you intended, which pulls you over the front of the board.
- 03
Let the pull straighten you.
Extend the front leg and let the kite lift you into a standing position. You are not pulling yourself up on the bar.
COMMON MISTAKEStanding before the power arrives. The kite stalls and you sit back down.
- 04
Point slightly downwind and go.
Board flat-ish, weight back, eyes up. The first few metres are about not falling, not about direction.
COMMON MISTAKETrying to go upwind immediately, which stops the board dead.
- 05
Park the kite and look ahead.
Back toward forty-five degrees. If you are making constant corrections, the kite is riding and you are a passenger.
COMMON MISTAKELeaving the kite low and powered. It will keep accelerating you until something gives.
FIRST RIDES
Short runs that end when you decide, not when you fall.
WHAT YOU WILL BE ABLE TO DOPlan a session that finishes where you meant it to.
Your first rides go downwind. All of them. Plan for that rather than being surprised by it: start upwind of where you want to end up, and treat the walk back as part of the session rather than a failure.
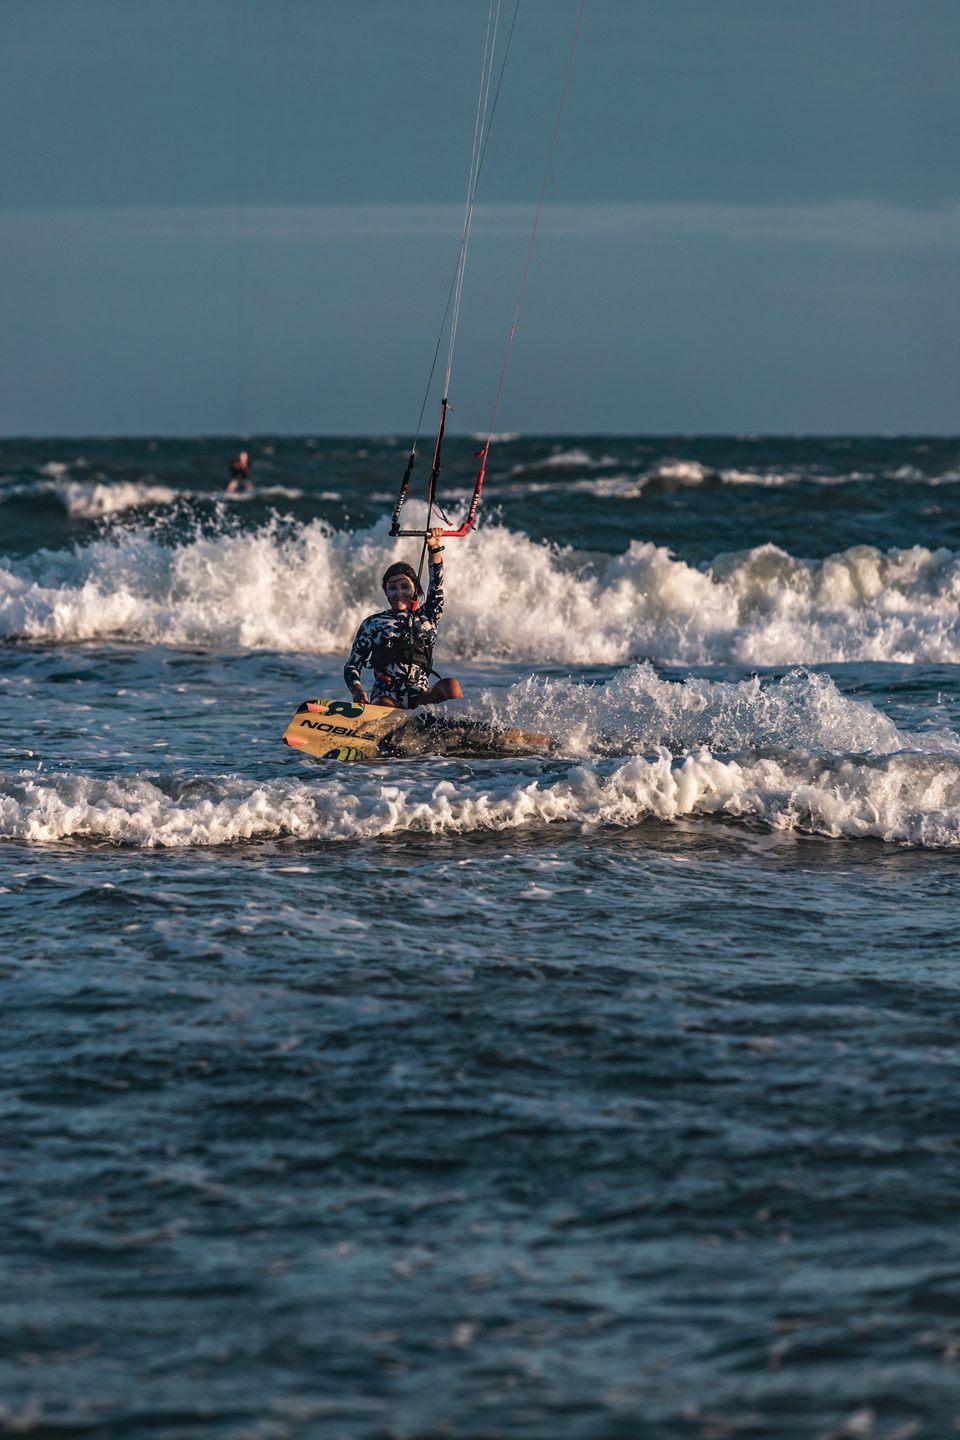
Stopping is a skill, learned the same day as going
A rider who can only start is a rider who can only be stopped by the water, the beach, or somebody else. Learn to shut the power down and sink the board on purpose, in the first session in which you ride at all.
CONTROL YOUR SPEED
Speed is a board control, not a kite control. This is the first thing IKO asks of an independent rider.
WHAT YOU WILL BE ABLE TO DOSlow down, hold a speed, and stop, using the edge.
Until now the kite has been doing everything. Edging is where the board starts to argue with it, and that argument is what riding actually is.
What an edge does
Tip the board onto its heel edge and it resists sideways through the water. That resistance converts the kite’s pull into grip rather than acceleration. Kite position is your coarse control; edge angle is the fine one, and it is far faster to apply.
RIDE BOTH DIRECTIONS
A rider who can only go one way cannot come back.
WHAT YOU WILL BE ABLE TO DORide away on either tack, and know which one you are on.
There is nothing conceptually new here, which is exactly why it gets skipped. The weak side does not arrive on its own; it has to be practised deliberately, and every session you spend avoiding it is a session of ground you cannot get back.
Tacks have names, and the names have consequences
Starboard tack means you are travelling to the right with your right hand and right foot leading. Under the right-of-way rules, starboard has priority and holds course, speed and heading. Port gives way. You cannot apply that rule if you do not know, without thinking, which one you are on.
What actually changes
Almost nothing, and that is the difficulty. The kite behaves identically; your body does not. The leading foot swaps, the hand that steers swaps, and the shoulder you look over swaps with them. A rider who has only ever gone one way has built all three habits on one side and none on the other, which is why the weak tack feels like a different sport rather than a mirror of the same one.
RIDE UPWIND
The skill that separates a rider who needs a lift back from a rider who does not.
WHAT YOU WILL BE ABLE TO DOReturn to where you started, under your own kite, on both tacks.
This is the one. C2SKY’s own rental gate is riding upwind, self-rescuing and packing down alone — which is IKO Level 3 stated in operational language. Everything before this chapter is preparation for it.
You cannot sail straight into the wind
There is a no-go zone either side of straight upwind that simply cannot be sailed. Progress upwind is made by riding a close reach — as close to the wind as you can hold — and zigzagging across it. It is the slowest point of sail, and it is worth every metre.
Upwind comes from the board
Kite low and forward, board hard on its edge, weight back. The kite is not pulling you upwind; the edge is converting the kite’s pull into a direction the kite cannot go by itself. This is why IKO teaches speed control before upwind and not after.
TRANSITIONS
Changing direction without stopping, and without the walk that follows a stop.
WHAT YOU WILL BE ABLE TO DOTurn, keep your speed, and ride away on the other tack.
IKO states the Level 3 outcome as change of direction without stopping. The version taught there is the sliding transition, and it is deliberately the one where you shed speed rather than carry it.
The kite leads
Send the kite across the window before the board turns. If the board goes first you have a board pointing one way and a kite pulling the other, which is a short conversation that the kite wins.
- 01
Slow down on purpose.
Ease the edge, let the board settle. You are not carrying speed through this one.
COMMON MISTAKEArriving at the turn with everything you had, which is the power jibe and a Level 4 skill.
- 02
Redirect the kite.
Steer it up and across toward the other side of the window. Smoothly — a fast redirect here is a large power stroke.
COMMON MISTAKESending it hard and being lifted mid-turn.
- 03
Change edge as the pull comes across.
Weight moves, board pivots, new edge engages.
COMMON MISTAKELooking down. Your body follows your eyes.
- 04
Ride away, then check upwind.
Your priority under the rules has just changed with your tack.
COMMON MISTAKEAssuming the water behind you is as empty as it was thirty seconds ago.
TOESIDE & JIBE
Riding on the other edge, facing the other way. Uncomfortable, then indispensable.
WHAT YOU WILL BE ABLE TO DORide a straight line toeside, and jibe out of it.
Toeside is riding with your weight on the toe edge, facing where your toes point. It is the mirror of everything you have built, which is why the first attempts feel like starting over — and why IKO pairs it with the jibe as a single skill, because the jibe exits toeside.
Why bother
Two reasons, and neither is style. Toeside is how you exit a jibe, so without it every change of direction ends in a stop. And it is the stance almost everything above Level 3 is built on — wave riding, foiling and most of the tricks assume you can hold it without thinking.
The jibe
A jibe turns the front of the board through downwind, which is why it keeps its speed: the board never points into the wind and never stalls. A tack does the opposite — it turns through the wind, and the board stops for an instant while it does. Both are useful. Only one of them lets you keep going.
RIGHT OF WAY
Eight rules, five kinds, and one duty that overrides all of them.
WHAT YOU WILL BE ABLE TO DOPass another rider without a conversation, and know which of you was supposed to move.
These rules are not a courtesy. They are how twenty people share a strip of water while attached to twenty-five-metre lines, and they only work if everyone is running the same set.
The rule above the rules
Avoid the collision. Right of way is not permission to hold a converging course into somebody who has not seen you. Everything below assumes you are already trying not to hit anyone.
When you meet
- Starboard has priority. The rider with their kite on the right-hand side holds course, speed and heading so the other rider can plan around them.
- Passing upwind, kite high. Passing downwind, kite low. This is the one you will use every session, and it is agreed silently at thirty metres.
- Overtaking gives way. Two riders going the same way: the faster one behind avoids the slower one in front.
Coming and going
On the water, the rider leaving the beach holds and the rider coming in gives way. On the sand, nobody has priority at all: both parties proceed and both keep clear of each other.
Who you give way to
- A rider surfing a wave has priority over one jumping or going the other way.
- Every other water and beach user has priority over you, and you pass downwind of them.
- To jump you need fifty metres clear downwind and thirty upwind. If you do not have it, you do not jump.
SELF RESCUE
The kite is not coming up, and nobody is coming out. Everything from here is yours to do.
WHAT YOU WILL BE ABLE TO DOGet yourself and your equipment back to the beach, calmly, from deep water.
You will use this when the wind dies, when a line goes, when the kite will not relaunch, or in any situation where you can neither body drag nor ride back. It is the last chapter in Level 3 and the one that makes the rest of the level mean anything.
Slow down before you start
You are almost certainly not in a hurry. Check the drop zone is clear, and then work deliberately — going fast makes every step harder and less safe, and it burns the energy you will need at the shore break.
Secure the kite
- 01
Let go of the bar, then fire the chicken loop release.
The kite depowers and flags out on one line. You are now connected only by the leash line.
COMMON MISTAKEFiring the leash release as well. That gives the kite away.
- 02
Climb the line, hand over hand.
Palms down, thumbs up. Lie back with your feet up — it takes the tension out of the line and makes the whole thing easier.
COMMON MISTAKEWrapping a line around a hand, wrist, arm or leg. Never, under any circumstances.
- 03
Lock the safety line short against the bar.
Two half hitches, then a figure of eight back around the bar, then lock it again. Done properly, the safety line is now shorter than the others and the kite cannot power up.
COMMON MISTAKELeaving it loose, so the kite reloads while your hands are busy.
- 04
Gather the rest and take the leading edge.
Work up to the kite, hold it under your armpit or a leg so there is no line tension, and finish tidying. The leash stays connected.
COMMON MISTAKELetting the kite drift away while you deal with the lines.
Then the fork
Flip the kite so the canopy faces upward — the “U” or smiling position — by folding one wingtip under and pushing the leading edge up with your shoulder. What happens next depends entirely on the wind direction.
In onshore, side-onshore or side-shore wind, fold one tip over the other and use the kite as a sail. Steer with an extended arm or leg, exactly as you did body dragging upwind. The kite still has its aerodynamic properties; your hand and body position control your speed and angle.
Pack down — but not yet
When a boat has definitely seen you, or the breaking waves are close, then pack down: canopy up, strut hoses closed on a one-pump kite, deflate valve open, fold, take both tips, roll to the centre strut, squeeze the air out, and close the valve again so water stays out. Lay the bar over the centre strut and strap the bundle with your harness. It floats well enough to swim on.
The last twenty metres
At the shore break, release your leash but stay with the equipment until you reach the breaking waves. Once they break, push everything away from you into the wave and swim. The waves will deliver the bundle to the beach. If you are being picked up instead, hand the kite up leading edge first — the water drains out and the wind cannot reopen the canopy.
CHOOSE YOUR KITE
There is no honest table that turns a wind speed into a kite size. There is a way of reasoning that gets you there.
WHAT YOU WILL BE ABLE TO DOPick a size from the conditions and the rider, and say why.
Every manufacturer publishes a wind range chart, and every one of them labels it a rough guide. Duotone says “a rough guide only”. CORE says its stated ranges are indicative and set with reference to experts — meaning the published range assumes a rider considerably better than you. They are not being coy; the number genuinely depends on seven things at once.
What actually moves the answer
| VARIABLE | PUSHES YOU |
|---|---|
| Heavier rider | Bigger — roughly one size per significant step |
| Lighter rider | Smaller |
| Gusty air | Smaller. Size for the gusts, not the average |
| Bigger board | Smaller — it planes earlier |
| Less experience | Smaller, and a narrower usable range than the chart implies |
| Rough water | Smaller |
| Different kite model | No transfer at all. A C-shape has a much narrower range than a bow |
Compiled from Duotone, Cabrinha, CORE and Ozone. Where three of four manufacturers agree independently: when in doubt, go smaller.
WEATHER
Two mechanisms make almost all the wind you will ever ride. Learn which one you are relying on.
WHAT YOU WILL BE ABLE TO DORead a forecast for what it can and cannot tell you, and know what ends a session.
Kiteable wind comes from a seasonal or synoptic flow — trade winds, a monsoon — or from a local thermal sea breeze, or from both adding together. Knowing which one you are on tells you when it will build and when it will not.
The sea breeze
Land heats faster than water. Warm air over the land rises, cooler air comes in off the sea to replace it, and the result is a wind that builds through the day and fades in the evening. It is why so many spots are afternoon spots, and why the morning forecast can look wrong at three in the afternoon.
Tide does four things
- Changes the depth where you are teaching or launching.
- Exposes obstructions that were not there an hour ago.
- Changes the current.
- Moves the usable beach, sometimes into somebody else’s space.
RIDING MUI NE
A monsoon that sets the season and a sea breeze that sets the afternoon.
WHAT YOU WILL BE ABLE TO DOKnow when to come, what the wind does here, and what to ask on your first day.
Two spots, twenty minutes apart, doing different jobs: the kite beach in front of the centre, and a flatter, shallower spot used for wingfoil and for first days on a board. Which one a session runs from is decided on the day, on the wind.
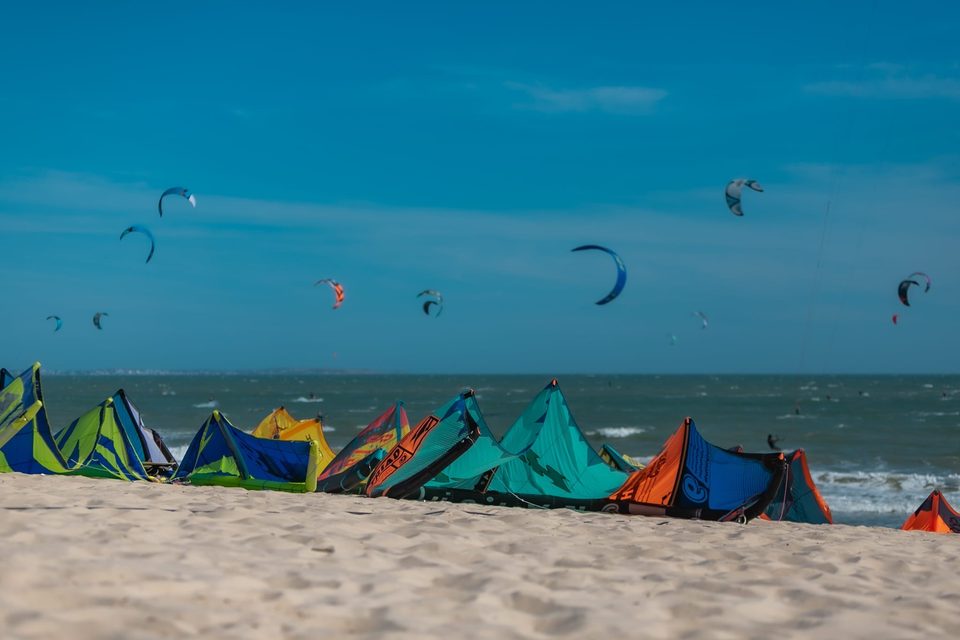
The season
Kite season runs November to April; the wing spot runs roughly October to the end of April. May to September is the monsoon and it is genuinely quiet — that is weather, and saying so is more useful than a brochure.
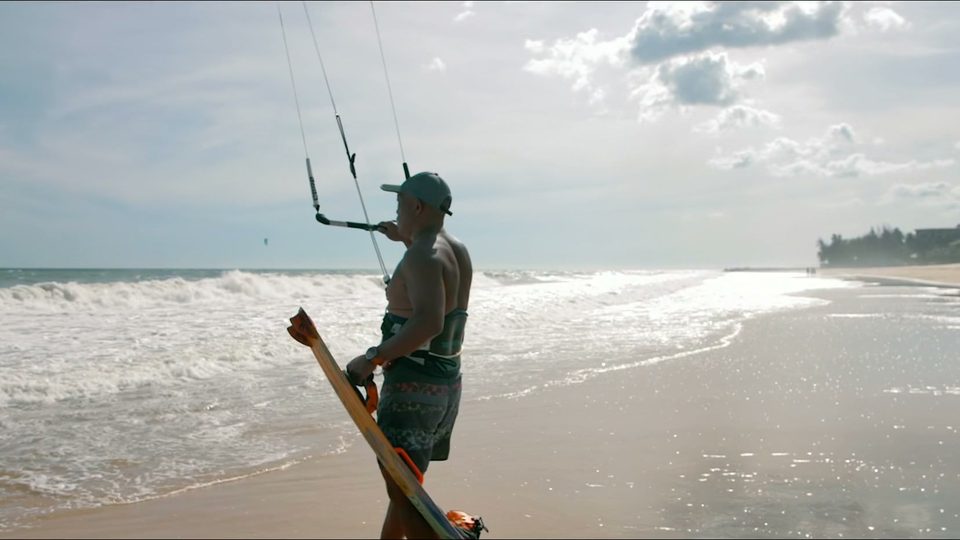
The wind, derived
Two things here were derived rather than remembered. The coastline at the centre runs about 066°/246°, so the beach faces roughly south-south-east; that comes from a two-hundred-metre elevation grid around the verified C2SKY pin. Season afternoon wind arrives from about 105° — east to east-south-east — from three seasons of reanalysis at the same coordinates. Put together, the wind meets the beach at around 39°: cross-onshore, which is exactly what the school has always called it.
The same data shows the daily cycle plainly: about 3.6 knots at dawn, building through the middle of the day, peaking mid-afternoon, easing after six. That is a sea breeze, and it is why lessons are afternoon lessons.
PROGRESSION MAP
Twenty-five named skills, four levels, and an honest answer about hours.
WHAT YOU WILL BE ABLE TO DOFind yourself on an international standard and see what comes next.
Hours are what you buy. Levels are what you are assessed against. The two are related, but only loosely, and anybody who promises you the second in exchange for the first is selling.
The IKO ladder
| LEVEL | CODES | WHAT IT MEANS |
|---|---|---|
| 1 · Discovery | 1A–1E | Spot assessment, setup, safety systems, first piloting, launch and land, self-land, packing |
| 2 · Intermediate | 2F–2I | Water relaunch, body drag with and without the board, board recovery, right of way, power strokes |
| 3 · Independent | 3J–3N | Speed by edging, upwind, sliding transition, toeside and jibe, self-launch and deep-water self-rescue |
| 4 · Advanced | 4O–4Y | Jumps, power jibe, rider and board recovery, signals, full ROW, equipment, weather and tides, aerodynamics |
Level 3 is the meaningful one: it is what lets you ride alone and rent equipment at IKO centres worldwide. Minimum age for Discovery is 12.
How C2SKY’s courses sit on it
| COURSE | HOURS | TYPICAL DAYS | WHAT THE SCHOOL SAYS |
|---|---|---|---|
| Taster | 2 | 1 | Can be completed within half a day |
| Discovery | 7 | 3–4 | Kite control, water start practice, first attempts on the board |
| Go For It | 12 | 6 | The typical point where students may be starting to ride |
| Real Deal | 15 | 7–8 | Working towards independence |
| Ultimate | 18 | 8+ | Working towards independence |
Owner-confirmed ladder, August 2026. A one-hour refresh sits below the ladder as an add-on, not a rung.
INDEPENDENT RIDER CHECKLIST
Independence has a definition. Two of them, from different directions, and they agree.
WHAT YOU WILL BE ABLE TO DOAssess yourself honestly against a standard rather than a feeling.
IKO’s Level 3 and C2SKY’s rental gate describe the same rider from different angles. IKO asks for riding in all directions including upwind, speed control, changing direction without stopping, riding among others under the rules, and self-rescue with a full pack-down in the water. C2SKY asks whether you can ride upwind, self-rescue and pack down alone. Same person.
0 OF 18 CONFIRMED
- IR-01
- IR-02
- IR-03
- IR-04
- IR-05
- IR-06
- IR-07
- IR-08
- IR-09
- IR-10
- IR-11
- IR-12
- IR-13
- IR-14
- IR-15
- IR-16
- IR-17
- IR-18
Independence is conditional
Independent in fifteen knots on flat water is not the same as independent in thirty with waves. The list has an unwritten column: in what conditions. Widening that column is the rest of your kitesurfing life.